P-30 Mind Control
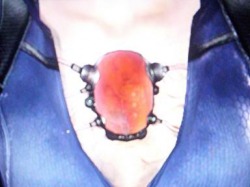
For those of you who haven't played Resident Evil 5 you are probably wondering why Jill has this red thing on her chest. Instead of trying to explain it in my words I'll leave it up to the pros over at Project Umbrella:
With a sufficient amount of antibodies extracted from Jill, Wesker saw no need for her until the discovery of the ancillary chemical "P30", related to the Progenitor Virus. The chemical grants the subject superhuman strength and makes them highly susceptible to control. However, the body metabolizes the chemical far too fast to be of any use. To this end, Jill was implanted with a mechanical device in her chest that would continuously inject her with the chemical. Now under Wesker's servitude, Jill was used as a servant to Excella Gionne and Wesker himself, being ordered to protect Ricardo Irvingand stop Chris and Sheva Alomar.
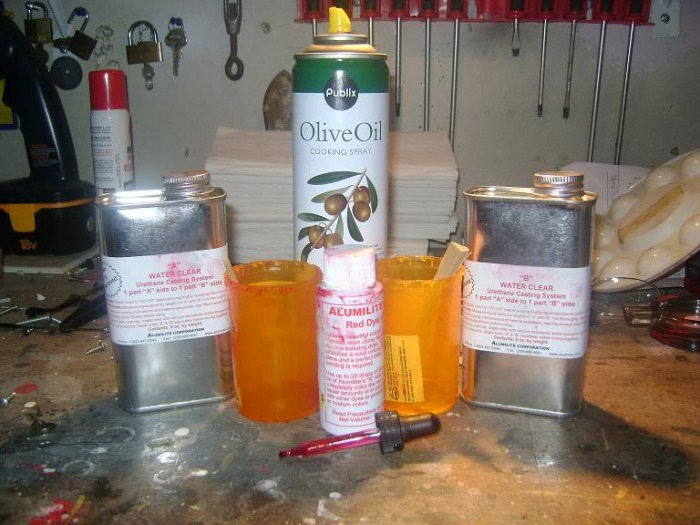
To sum all that up, it keeps Jill under the control of Wesker, so I saw it as something necessary to add to the costume. I definitely wanted to make this and do it right. So that meant venturing into a new field....resin. I read up on it and learned as much as I could before I went off to a hobby shop. The associate there was really helpful and recommended some good stuff for me to use. After some trial and error on my first few tries I managed to get the hand of using this stuff.
With a sufficient amount of antibodies extracted from Jill, Wesker saw no need for her until the discovery of the ancillary chemical "P30", related to the Progenitor Virus. The chemical grants the subject superhuman strength and makes them highly susceptible to control. However, the body metabolizes the chemical far too fast to be of any use. To this end, Jill was implanted with a mechanical device in her chest that would continuously inject her with the chemical. Now under Wesker's servitude, Jill was used as a servant to Excella Gionne and Wesker himself, being ordered to protect Ricardo Irvingand stop Chris and Sheva Alomar.
To sum all that up, it keeps Jill under the control of Wesker, so I saw it as something necessary to add to the costume. I definitely wanted to make this and do it right. So that meant venturing into a new field....resin. I read up on it and learned as much as I could before I went off to a hobby shop. The associate there was really helpful and recommended some good stuff for me to use. After some trial and error on my first few tries I managed to get the hand of using this stuff.
This is how it all started, with the supplies. Yeah it looks like a very odd line up but all of this stuff did the trick. The tins on the right and left are the casting resin and activator, the dropper is for the bottle of dye in the center, the spray is for my mold and the yellow containers are for mixing. I wont go into all of the details that are involved in the process, but if you are looking for a tutorial then head over the TAP Plastics for some great information.
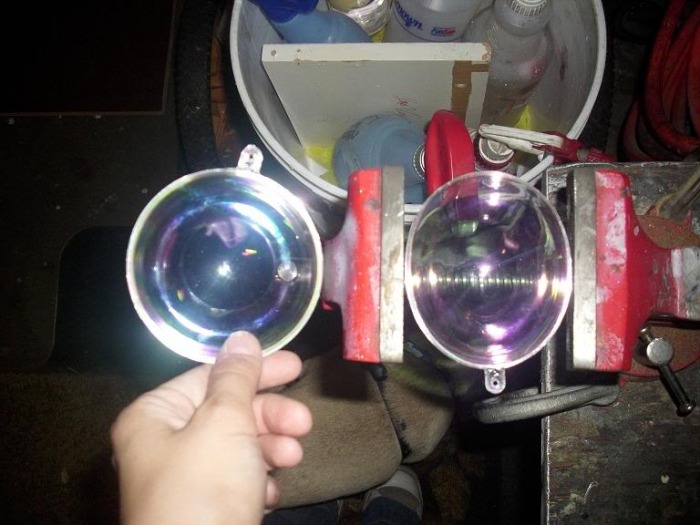
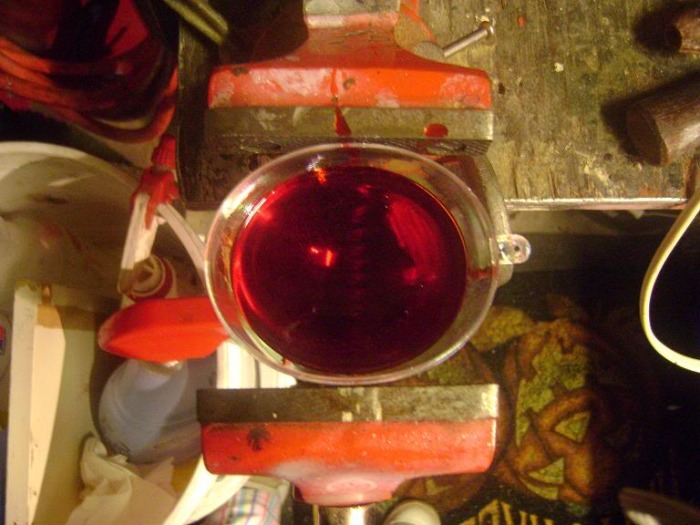
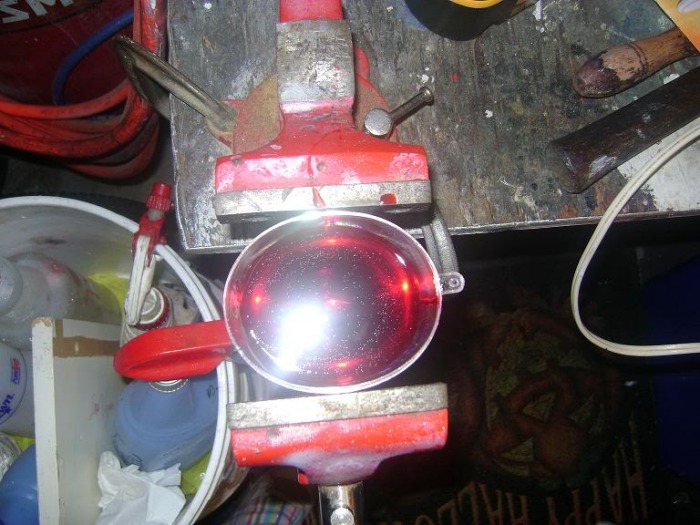
Resin is kind of tricky to use, when you mix the two chemicals together it will heat up and might melt the mold you use. I opted to use these round bubbles that I found at the craft store. In order to get and oval like shape I popped one into a vice and gently turned it to make it curve.
This was one of my first test runs, it worked out very well but the mold gave me a bit of a challenge. When I made my final cast I ended up having to break the mold in order to get my piece out - rookie mistake. The image on the right is after the resin had spent some time drying.
 |
 |
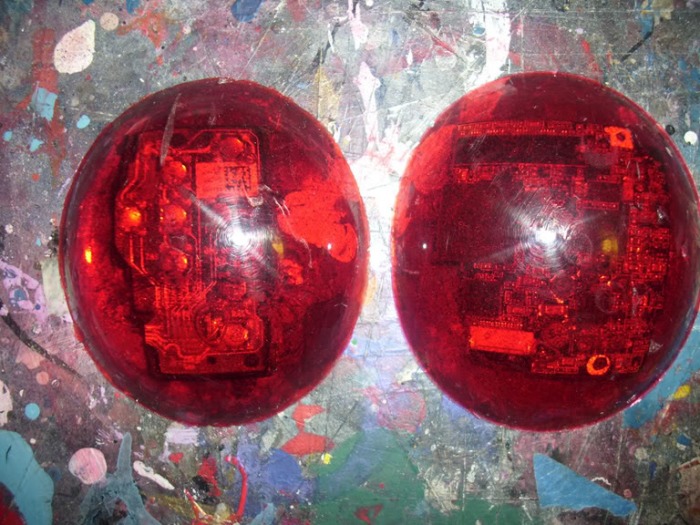
If you look very close to Jill's device in the game you can make out that something is sealed inside there, so I did my best to recreate it. These were the two pieces that I had to choose from, each one had a "chip" that I had sealed inside. I had a broken digital camera lying around so I opened it up and pulled out some parts. When I cast the resin I filled my mold half way and let it dry a bit, then I placed the "chip" on top and I filled it the rest of the way.
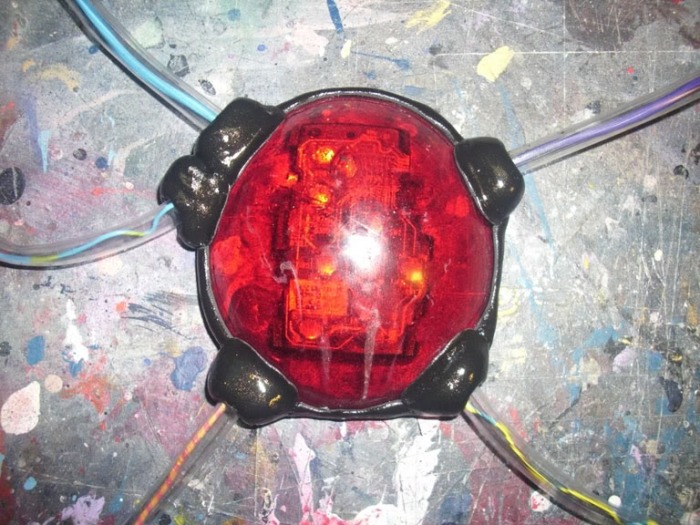
The last step was to add all of the details and this was the fun part. I molded Model Magic air dry clay around the jewel itself and added the little nodes on the side. Before it dried I took fish tank tubes and pressed them into the nodes to get an imprint for the tube. I then let it dry in front of a fan and when it was solid enough I painted it with metallic acrylic paint in black. The wires were randomly found around my garage and I pulled them through the tubes and then I glued them into place. I would definitely not recommend hot glue since it did not hold up throughout the con and the tubes ended up popping out. The device was adhered to my chest with spirit gum and held in place by the tubes.
 |
 |
