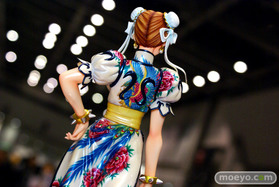
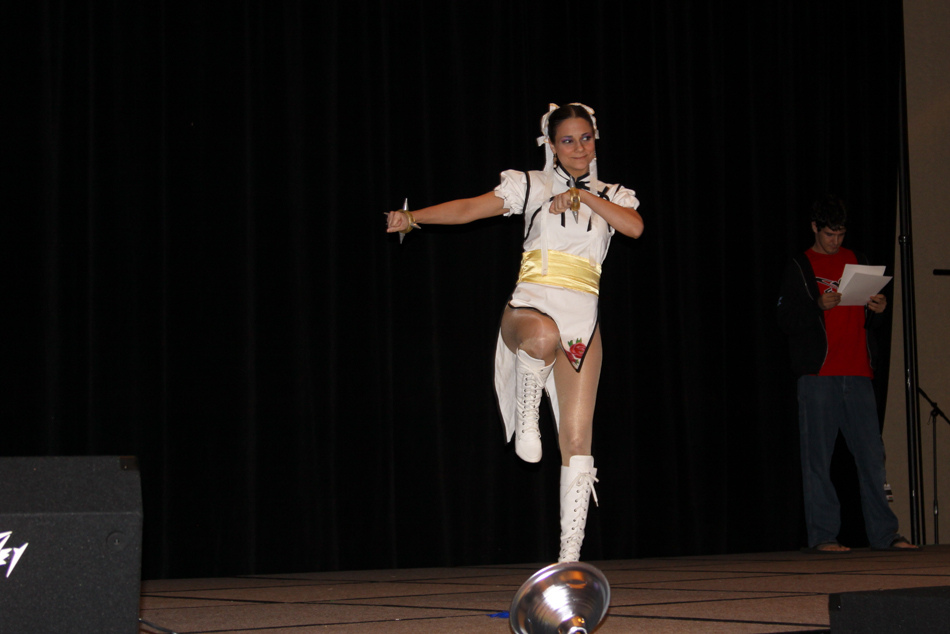
Chun Li
Street Fighter
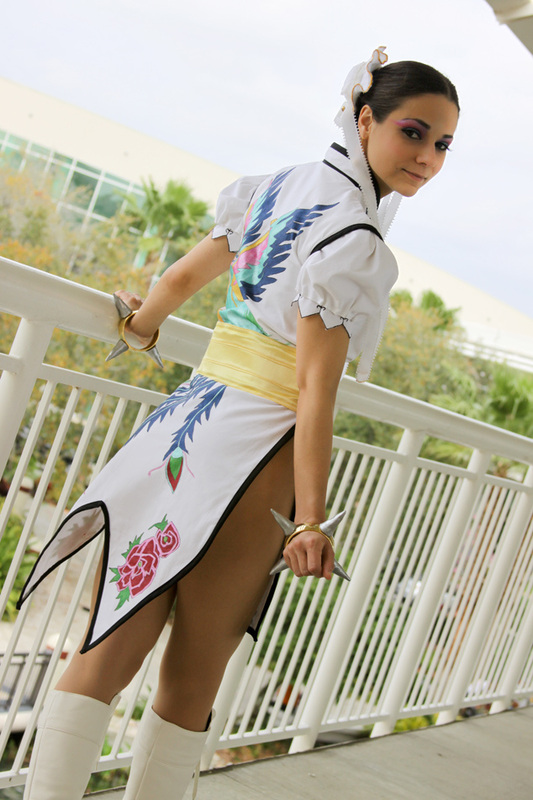
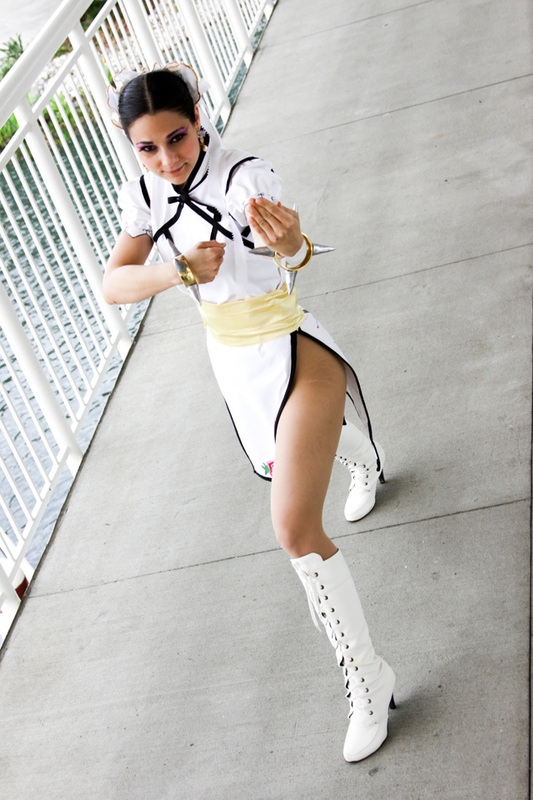
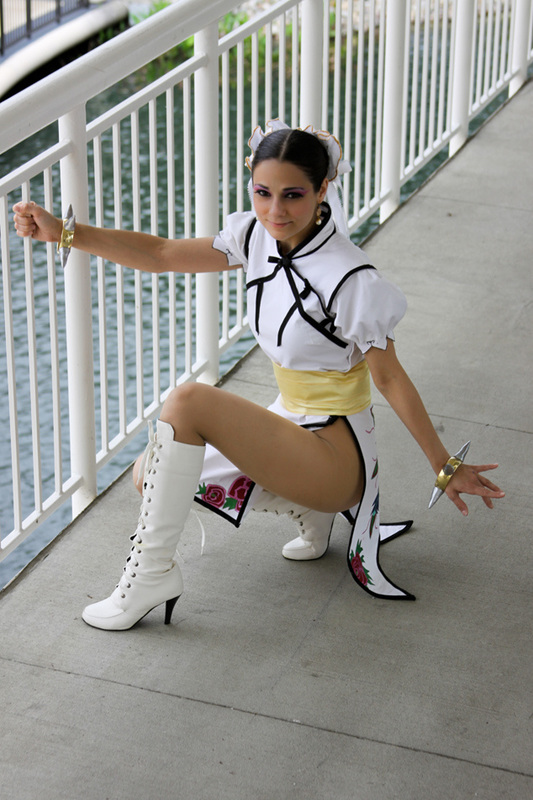
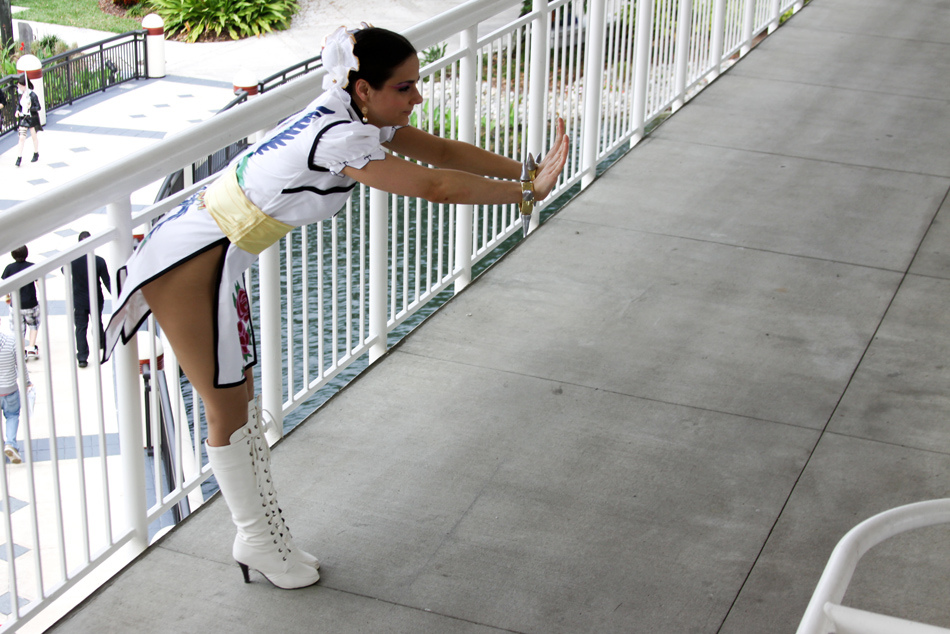
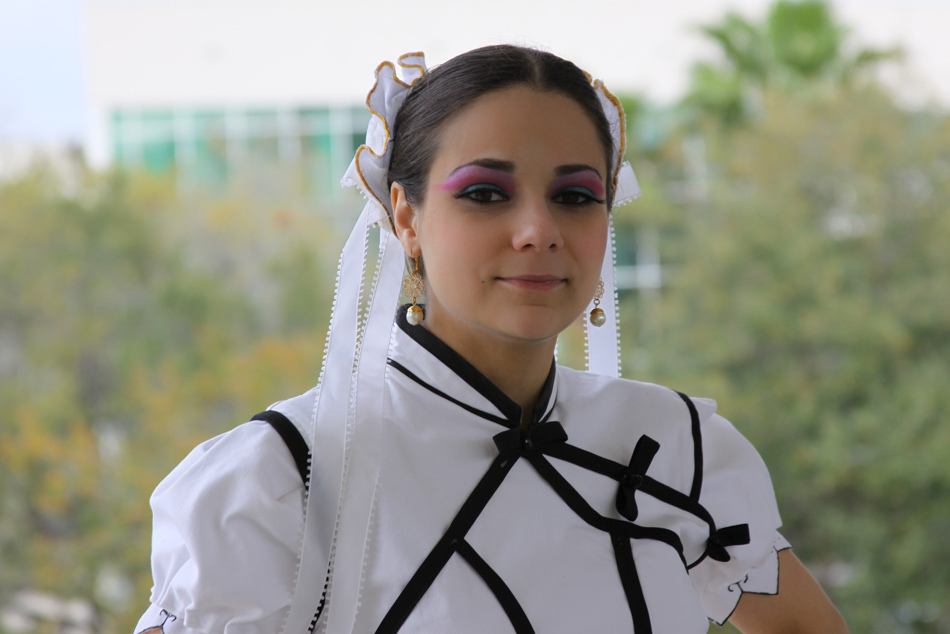
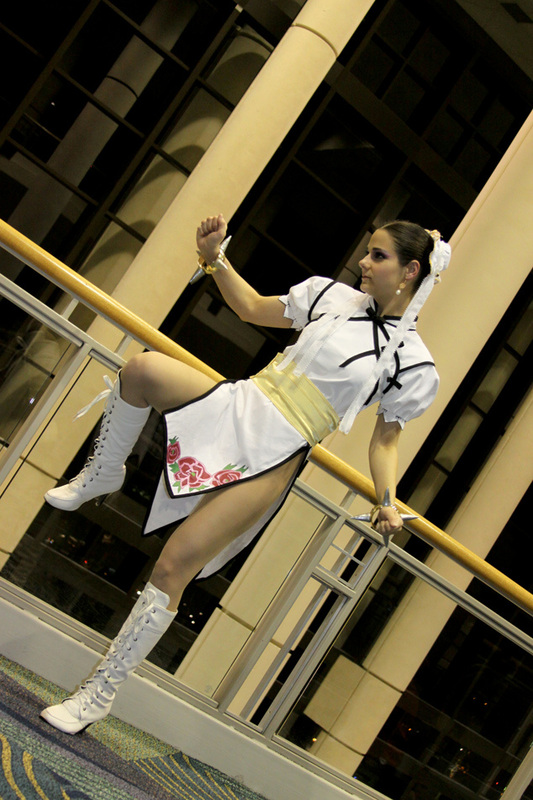
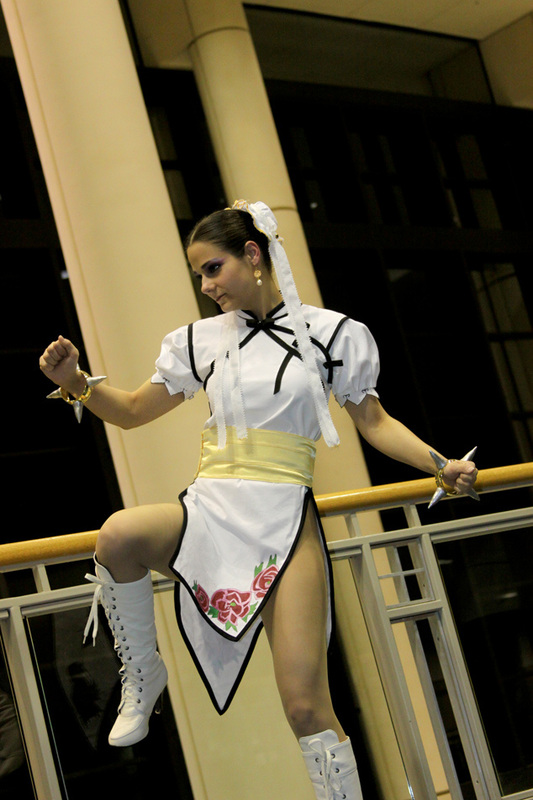
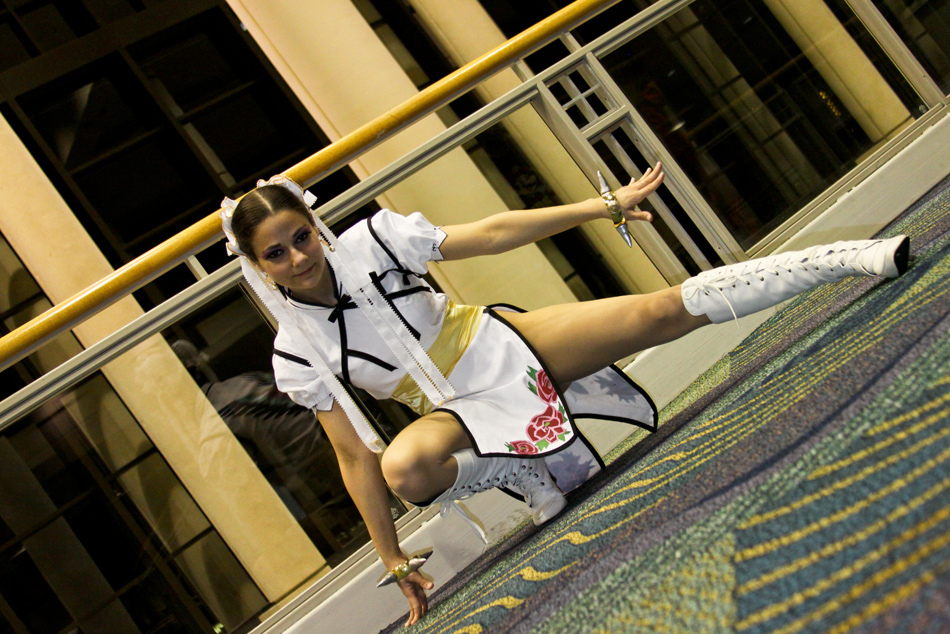
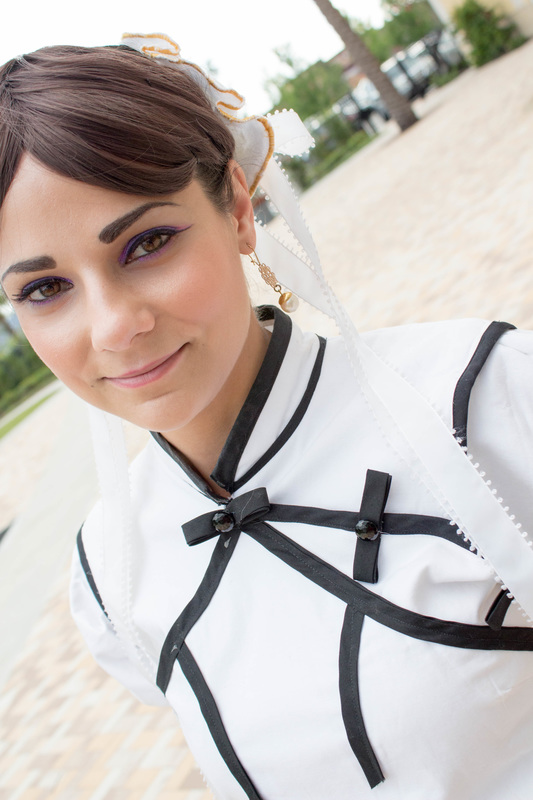
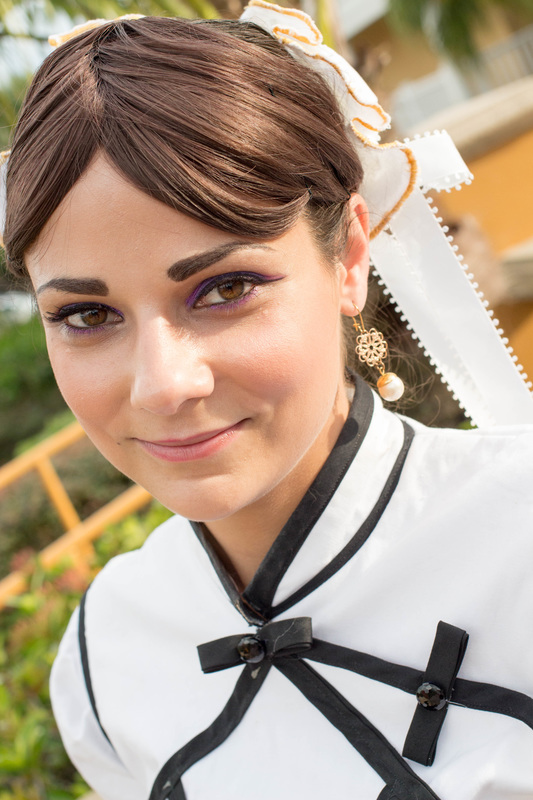
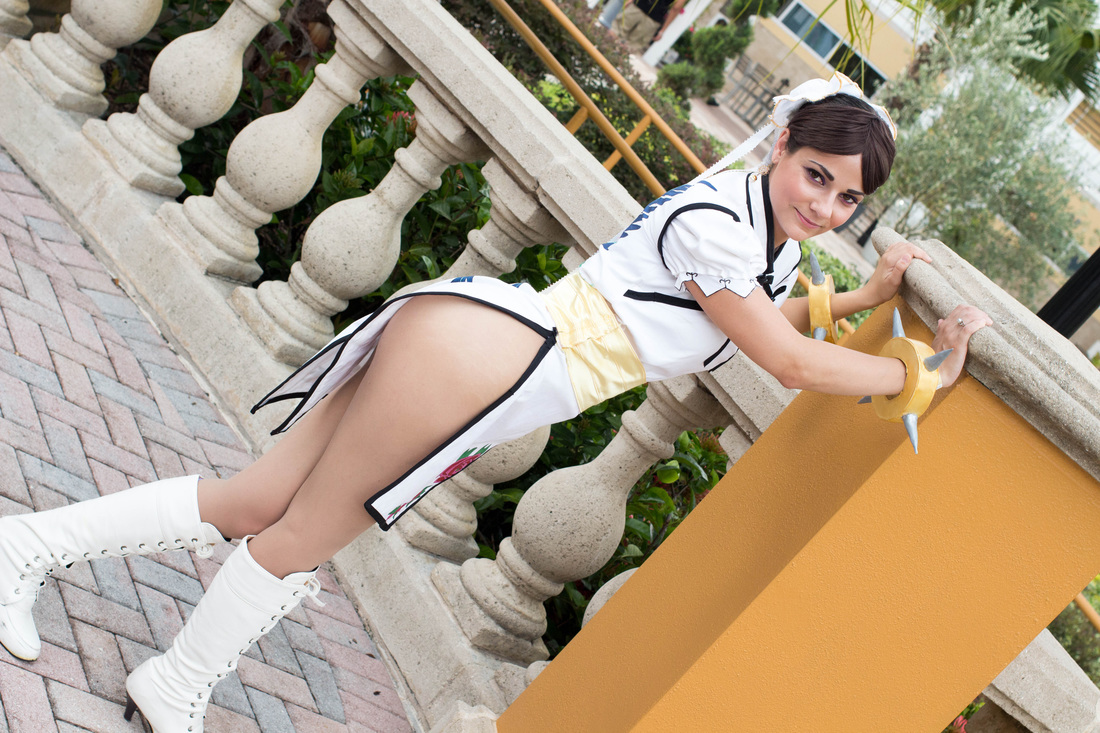
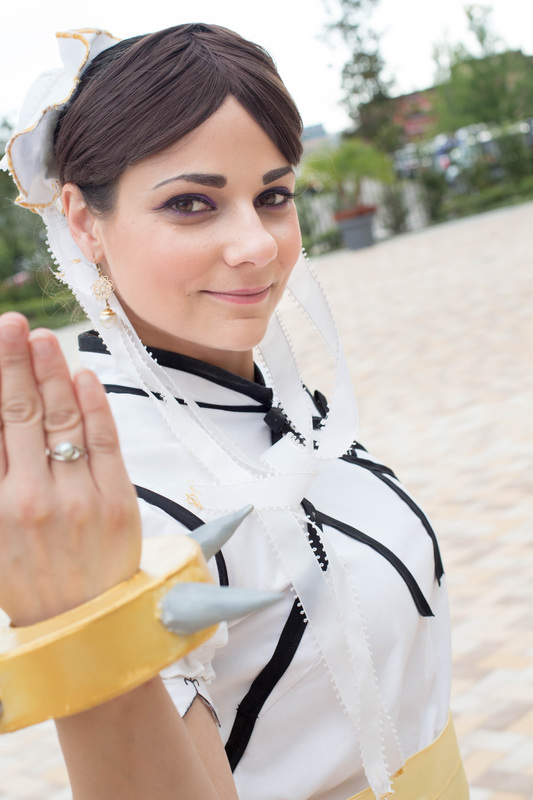
MERSA white dress variant
- First worn to EXP Con 2011
- Price wise I spent $150
- Construction time, two months
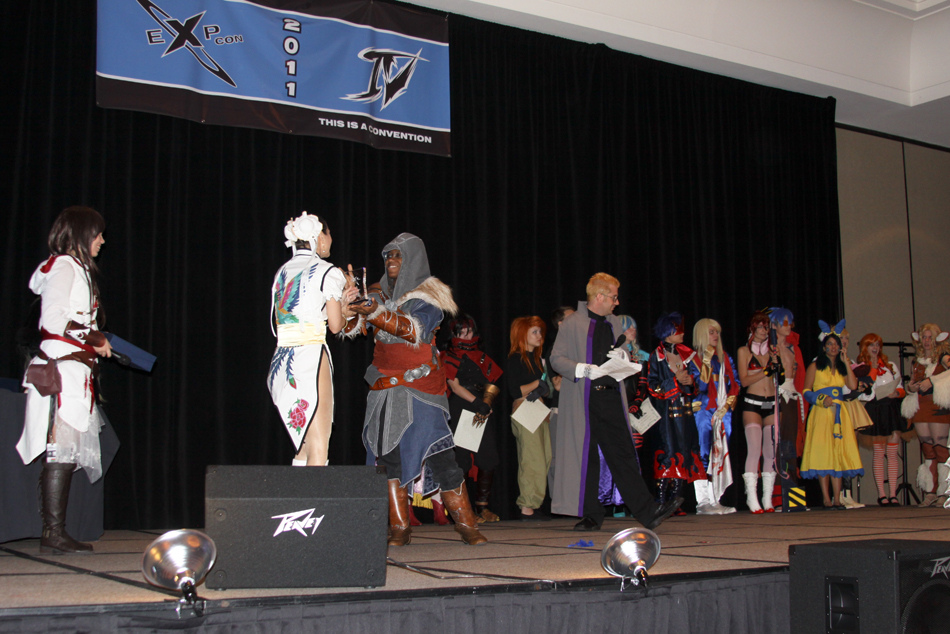
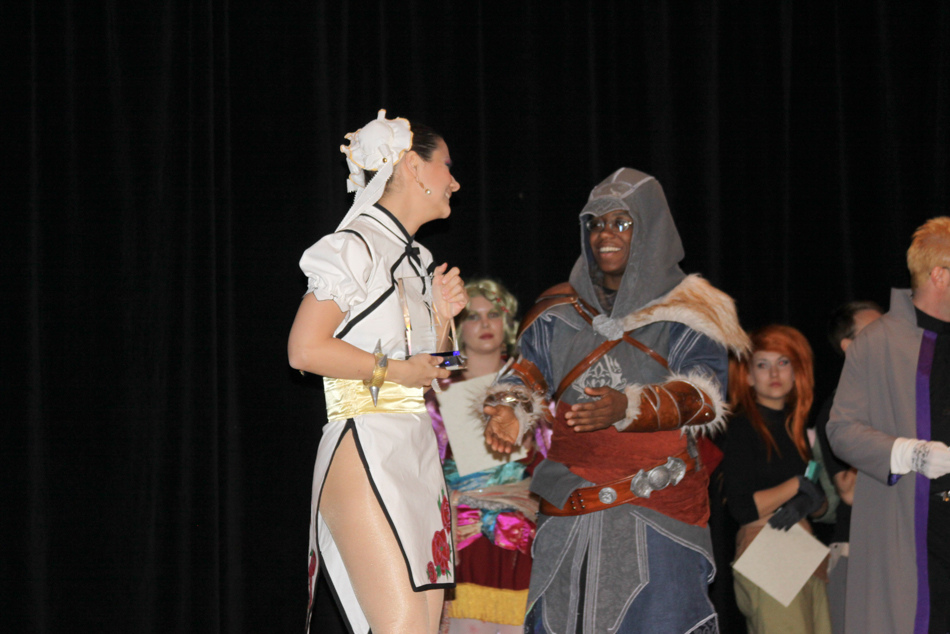
- Awards won, Best Individual - EXP Con Costume Contest


Quite a while ago I came across some photos of this figure on Kotaku, I instantly knew that someday I would end up making this costume. I must say that I am a fan of the Street Fighter anime and that I'm pretty terrible at the games XD I had cosplayed as Chun Li for Halloween back in high school, so it was fun to revisit the character. We had decided to do a Street Fighter group this year after having so much fun with Mortal Kombat. So I sketched out ideas on how to approach this costume and I did a lot of research before I started.
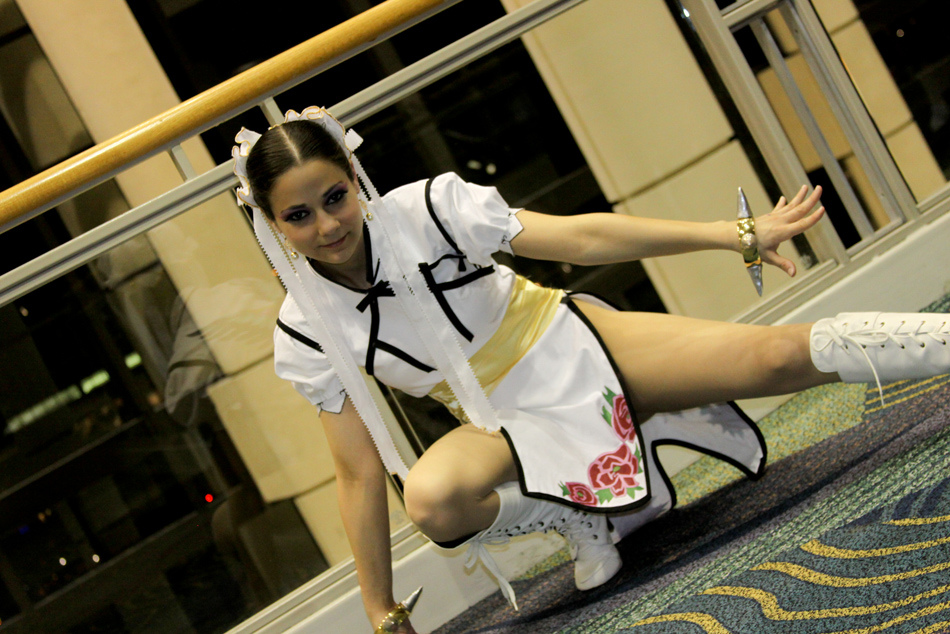
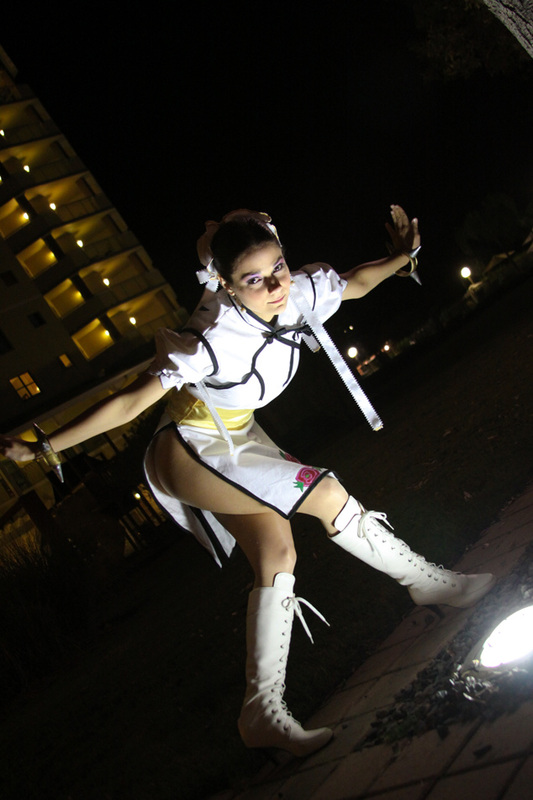
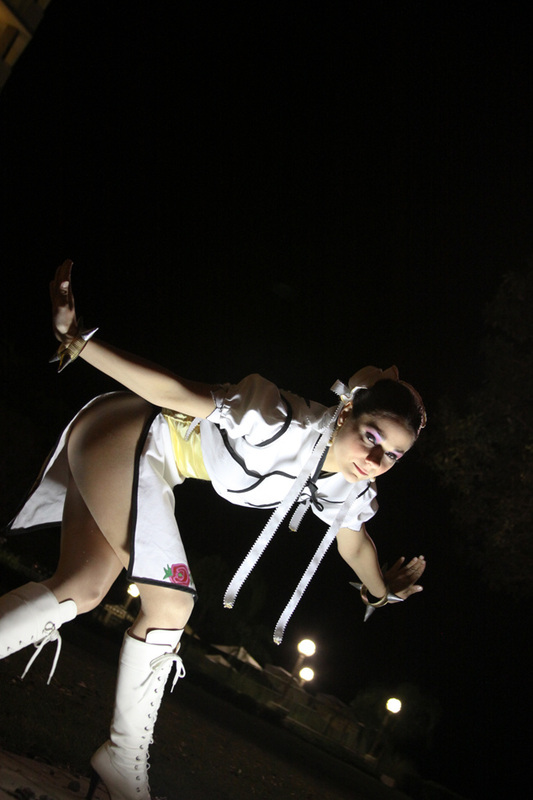
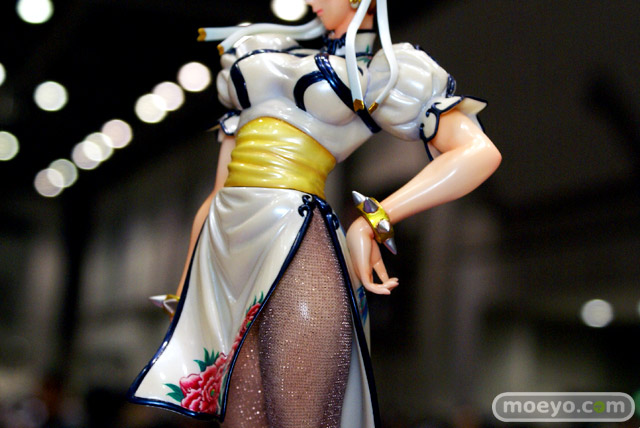
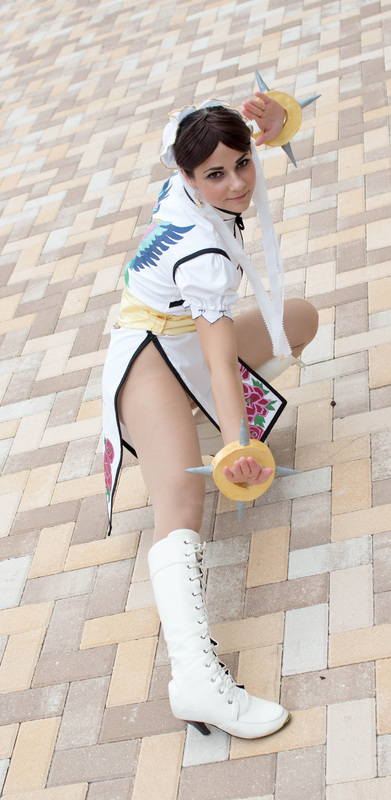
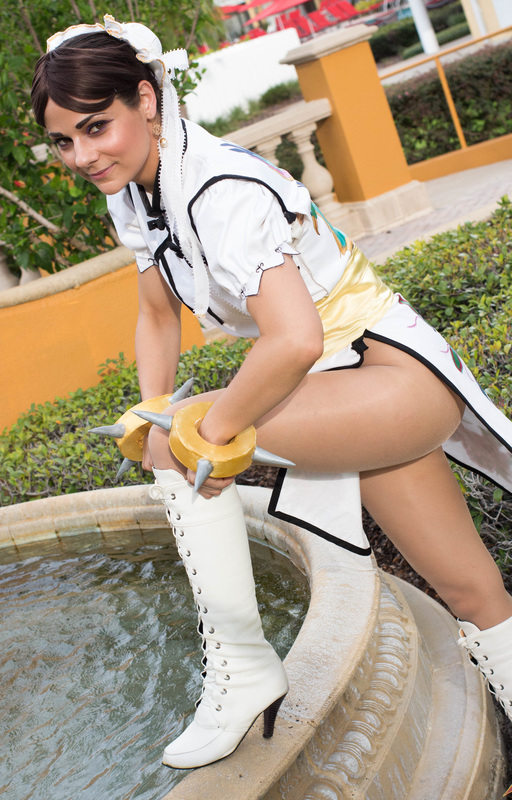
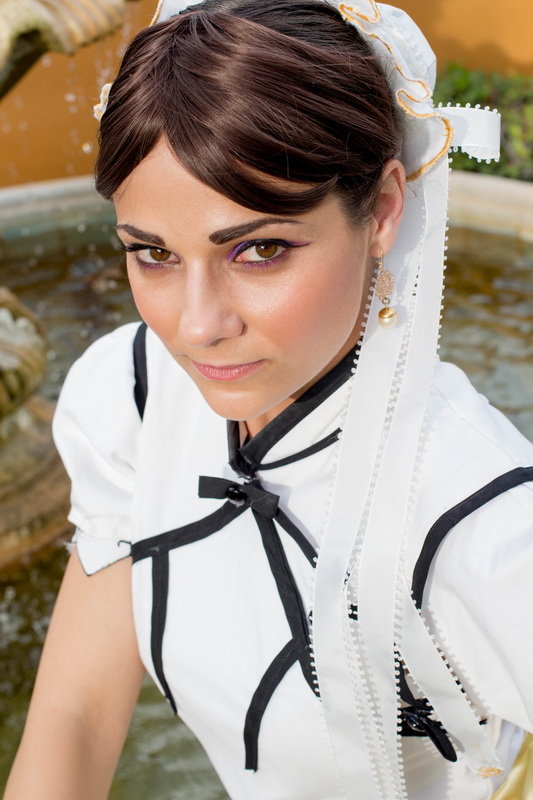
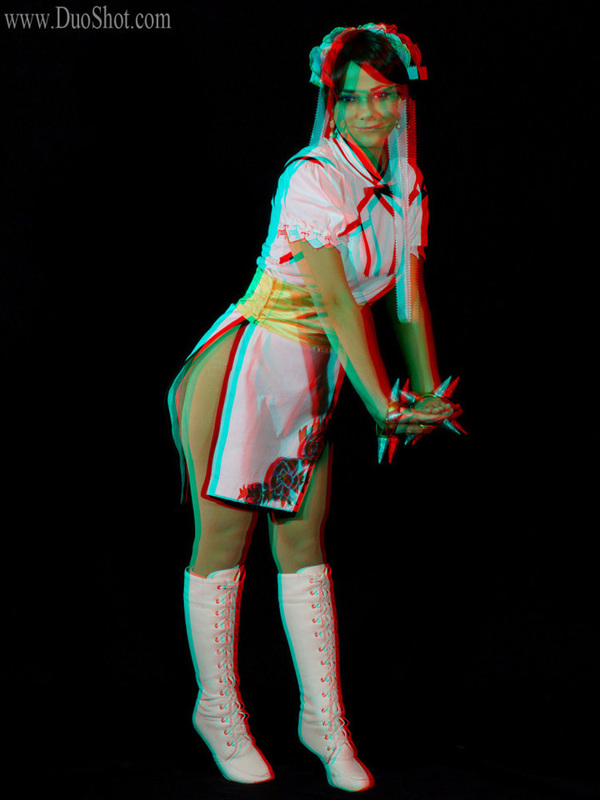
I altered dress C from New Look pattern #6203, it took a bit of reworking but it was a simple pattern to use. My fabric choice for the dress was always going to be cotton; I knew it would take the fabric paint and look cleaner than satin. I didn't just want to use regular quilting fabric so I chose to use white stretch sateen. It has a slight stretch to it and a nice shine that you don't get with regular cottons. The entire dress is lined and faced to give it more stability and it had a velcro closure going up the side. The front flaps of the dress as well as the collar also close with velcro and a few sew in snaps. The puffy sleeves were made using a pattern piece from a renaissance gown, I decided to omit the black desgins on the sleeve and the back of the dress.
I altered dress C from New Look pattern #6203, it took a bit of reworking but it was a simple pattern to use. My fabric choice for the dress was always going to be cotton; I knew it would take the fabric paint and look cleaner than satin. I didn't just want to use regular quilting fabric so I chose to use white stretch sateen. It has a slight stretch to it and a nice shine that you don't get with regular cottons. The entire dress is lined and faced to give it more stability and it had a velcro closure going up the side. The front flaps of the dress as well as the collar also close with velcro and a few sew in snaps. The puffy sleeves were made using a pattern piece from a renaissance gown, I decided to omit the black desgins on the sleeve and the back of the dress.
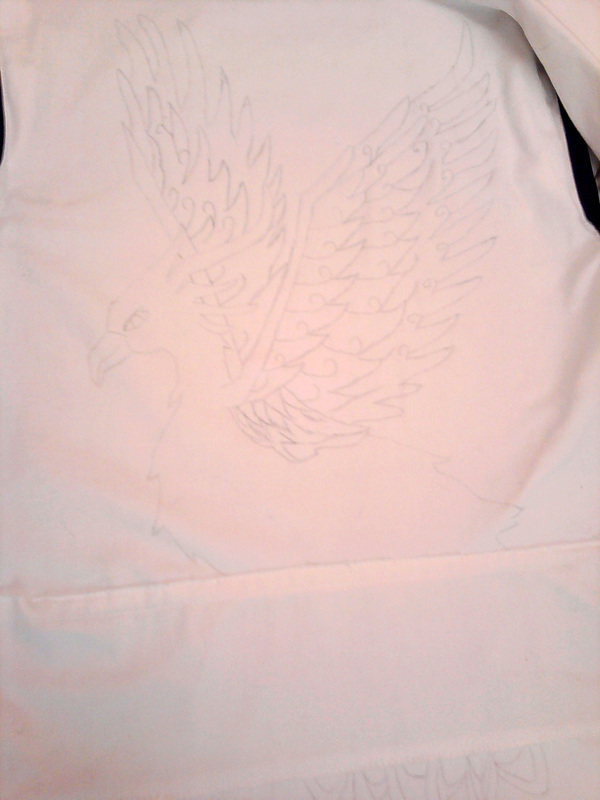
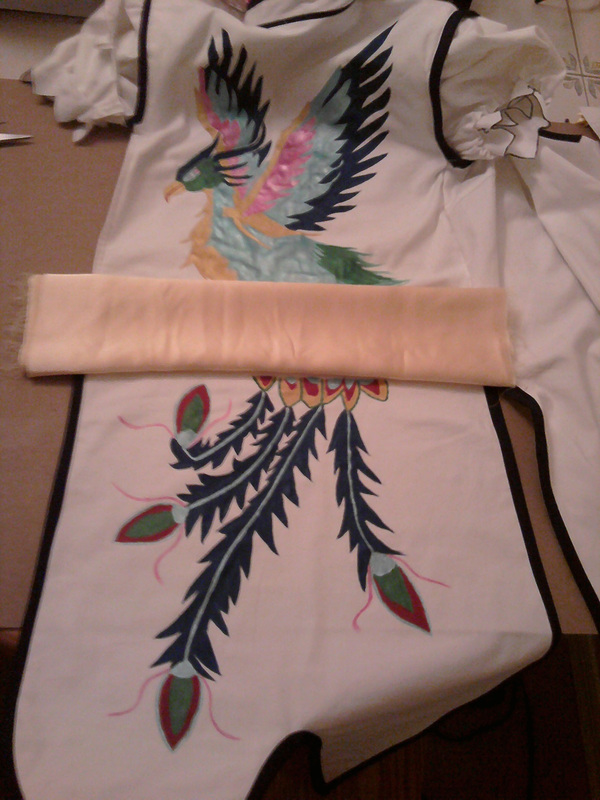


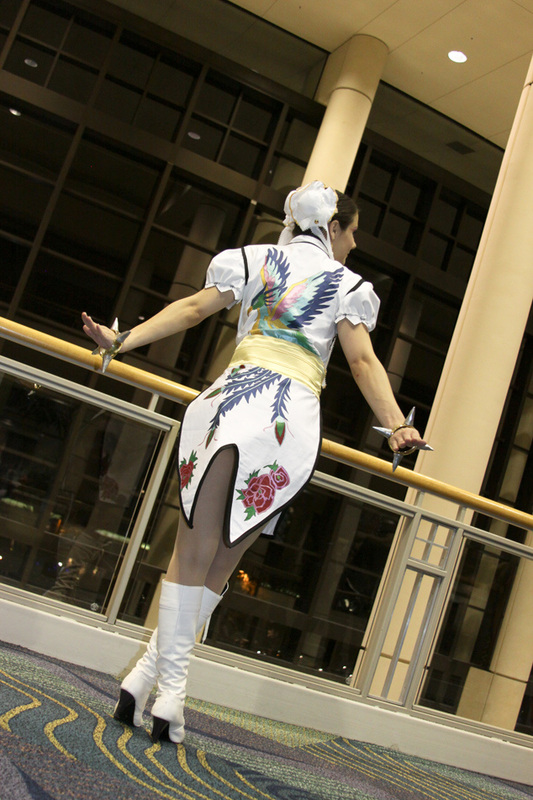
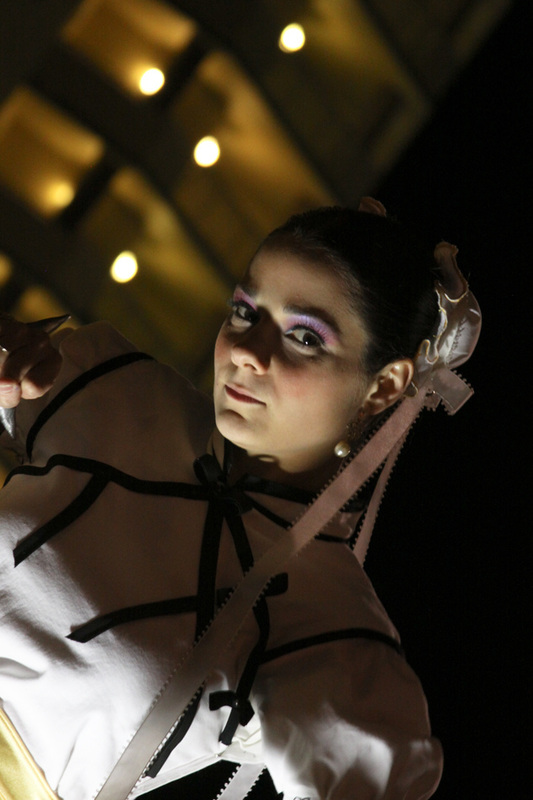
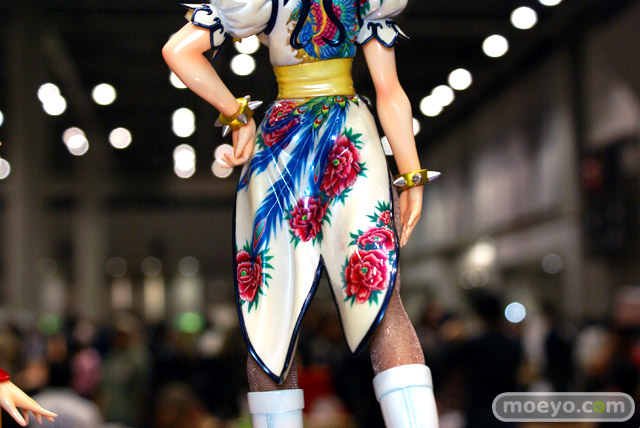
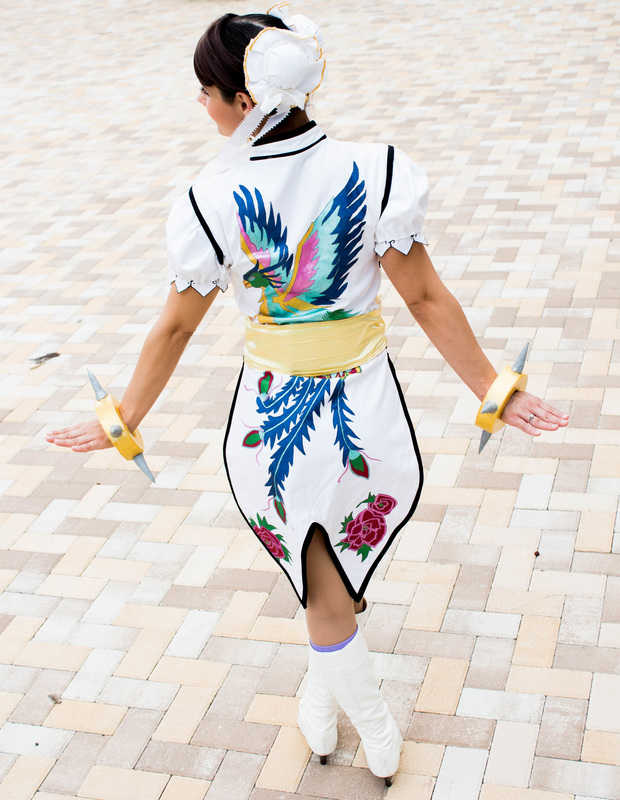
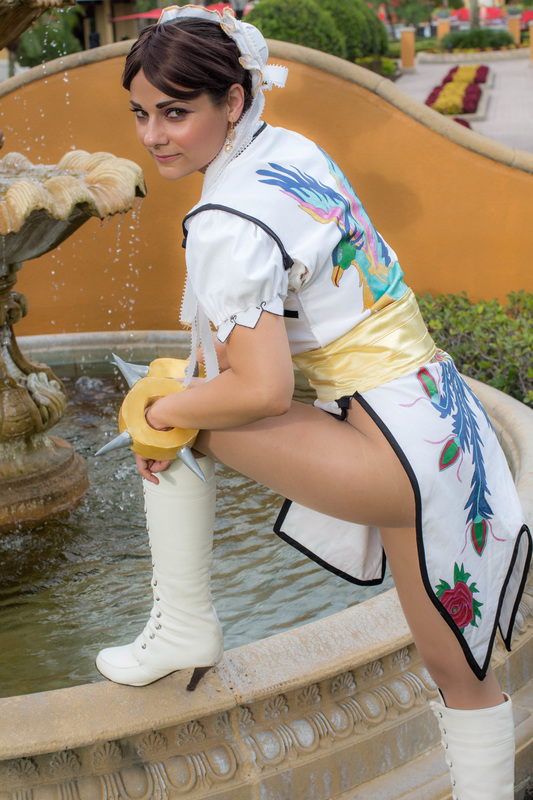
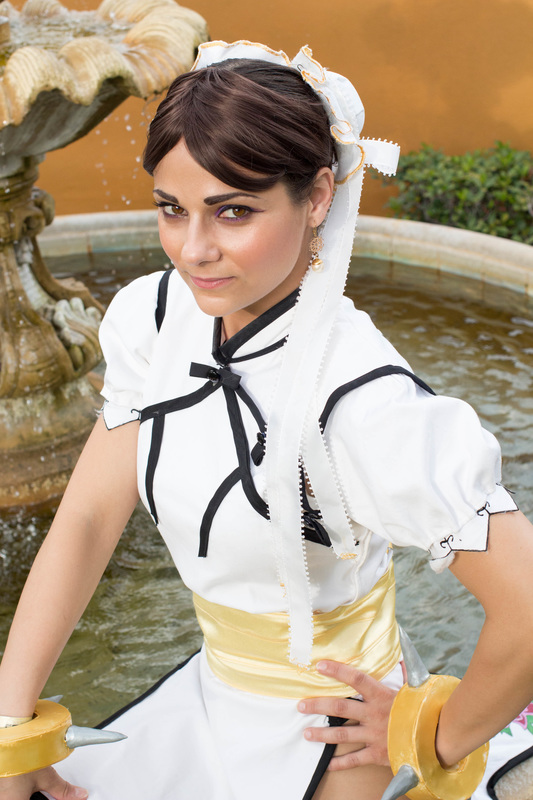
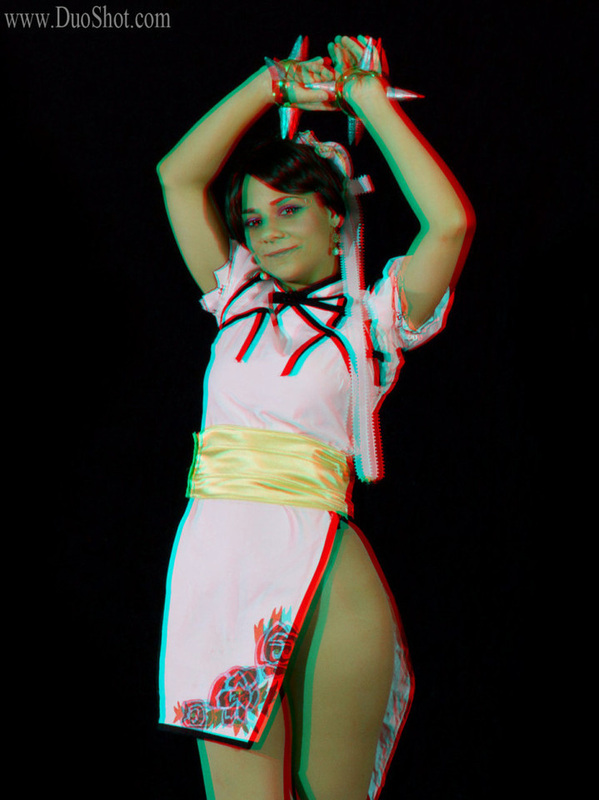
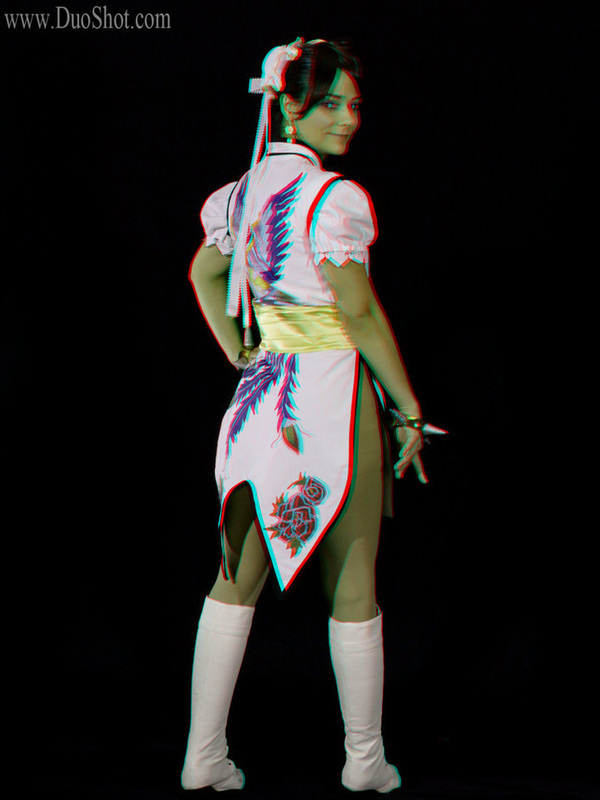
Having this dress close up the side made it possible for me to lay it flat in order to paint it. I traced a really cool phoenix design that I found online and I transferred it to the back of the dress. The bottom tail feathers and all the flowers were hand drawn onto the fabric as well. Since it worked so well for my Cortana costume I chose to use Jacquard Lumiere fabric paints once again. I played around with blending the colors and thankfully I had no major spills. Once all the painting was done I traced around all the edges with a fine tip scrap booking pen and that is what really made the design pop.
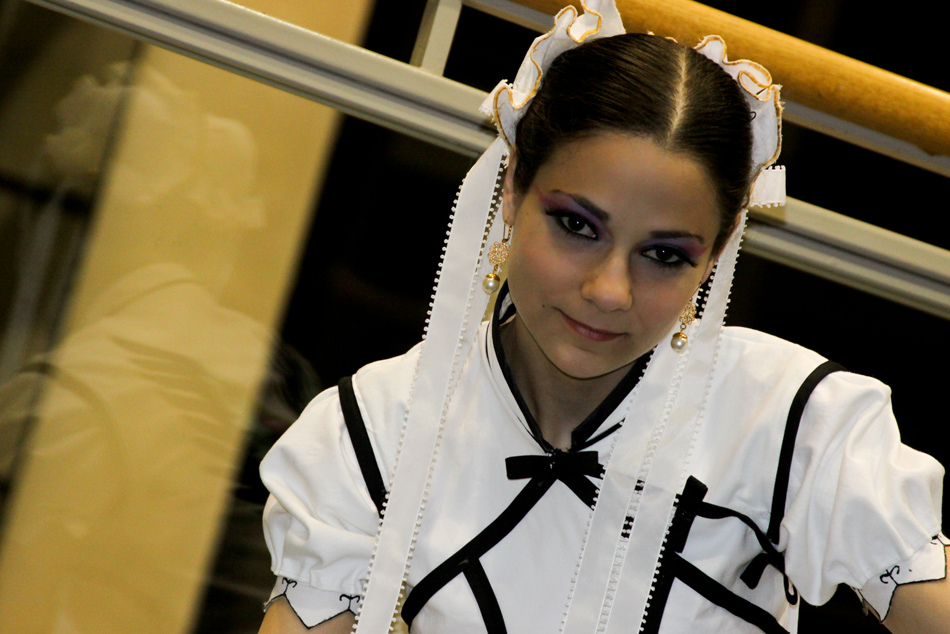
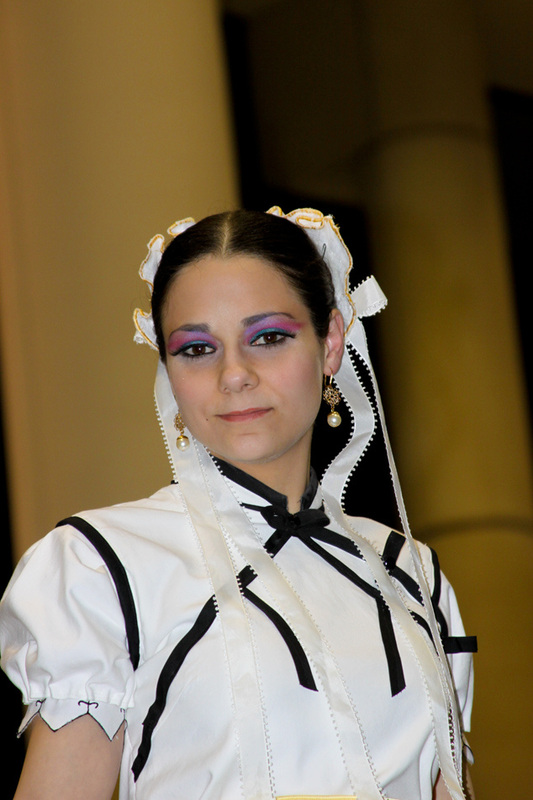
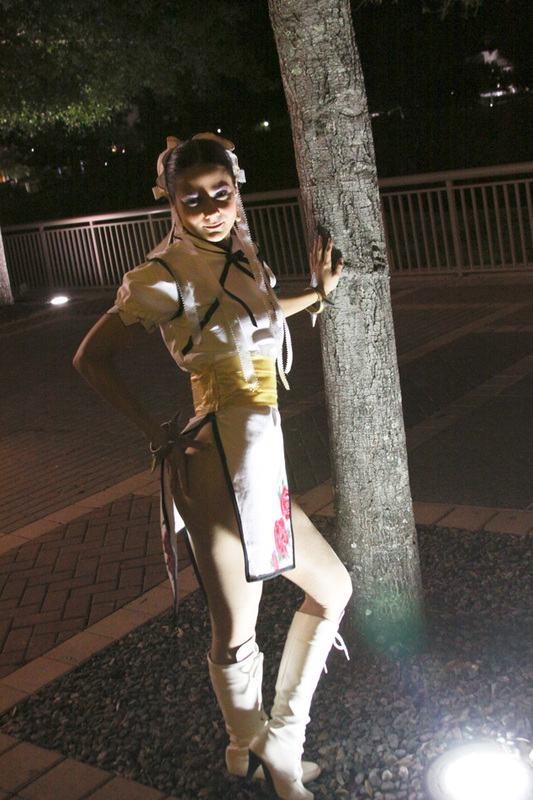
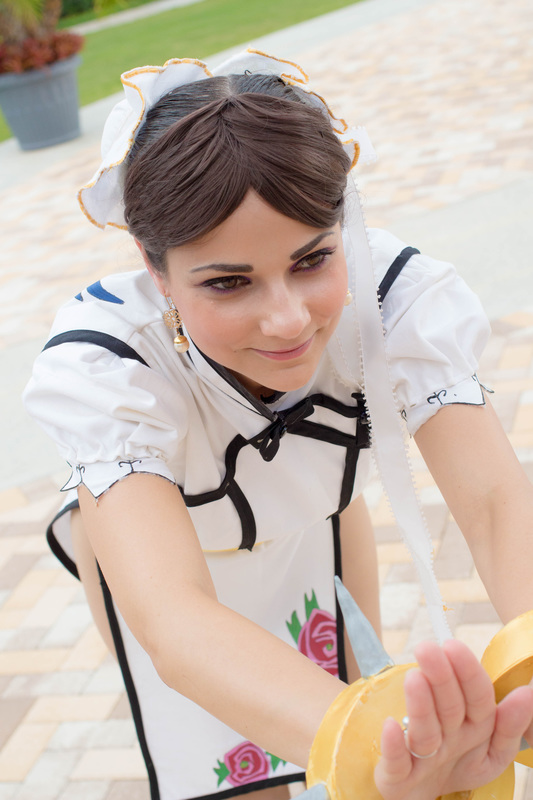
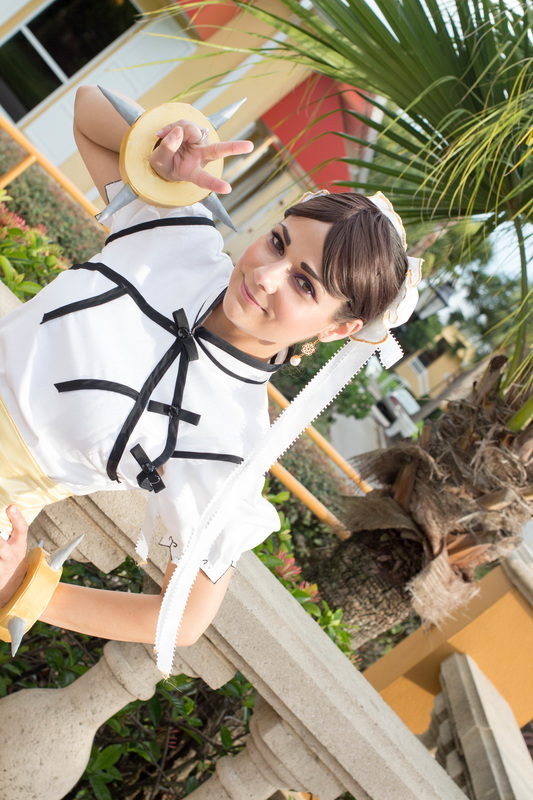
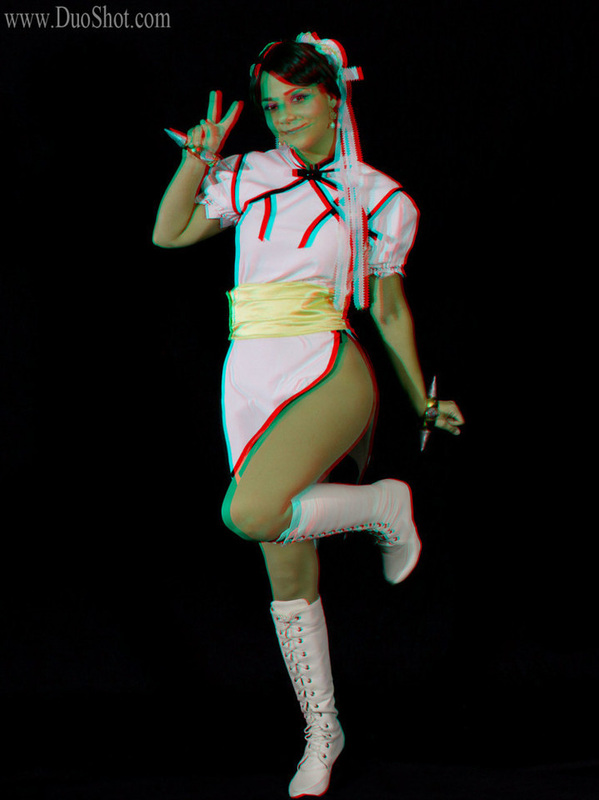
The accessories for this costume were a lot of fun. The sash was made out of gold crepe back satin and the earrings and boots were ordered off of eBay. The bracelets I purchased at Claire's and I spray painted them gold. Them I made the spikes out of sculpey bake clay and glued them on. I decided to make here hair buns since I didn't have enough hair to achieve the look on my own. The hair buns were made out of styrofoam balls that I cut in half and hollowed out. I then used the same fabric as the dress and cut out circles to cover the balls, I satin stitched around the edges with some gold embroidery thread. Then I glued them onto the styrofoam and added all the ribbon details. All I needed to do was put my hair in tight little buns and and slip these over them and pin them in place.
The accessories for this costume were a lot of fun. The sash was made out of gold crepe back satin and the earrings and boots were ordered off of eBay. The bracelets I purchased at Claire's and I spray painted them gold. Them I made the spikes out of sculpey bake clay and glued them on. I decided to make here hair buns since I didn't have enough hair to achieve the look on my own. The hair buns were made out of styrofoam balls that I cut in half and hollowed out. I then used the same fabric as the dress and cut out circles to cover the balls, I satin stitched around the edges with some gold embroidery thread. Then I glued them onto the styrofoam and added all the ribbon details. All I needed to do was put my hair in tight little buns and and slip these over them and pin them in place.
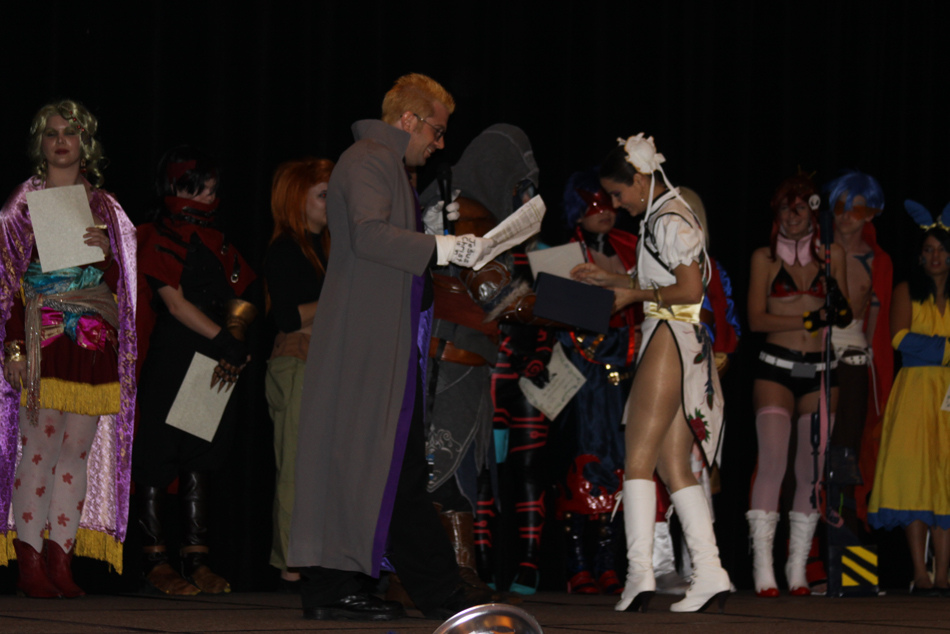
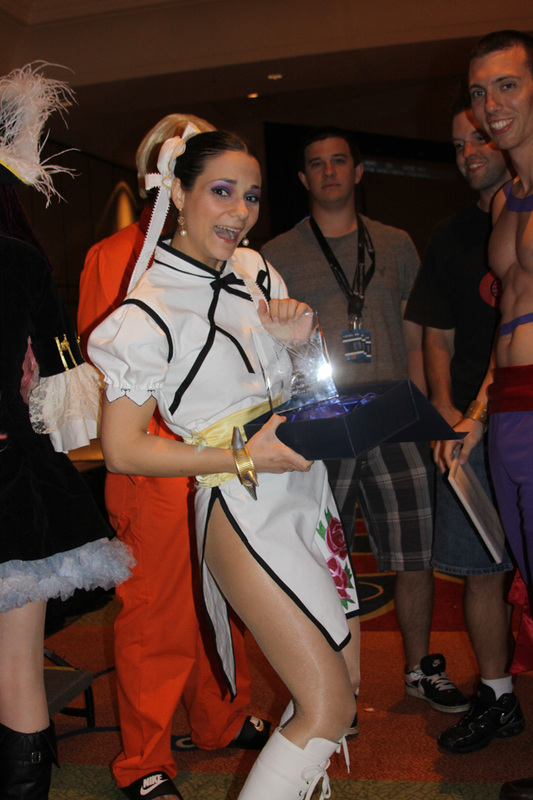
I decided to enter the costume contest after all the hard work I had put into this costume. This was only my fourth time entering a contest and I am happy to say that it was my first win ever! Thanks to all my awesome friends for their support and thanks to Trevor for helping me so much with the project. I was able to bring home the Best Individual award :)


Photos take by HoodedWoman at CEO 2015


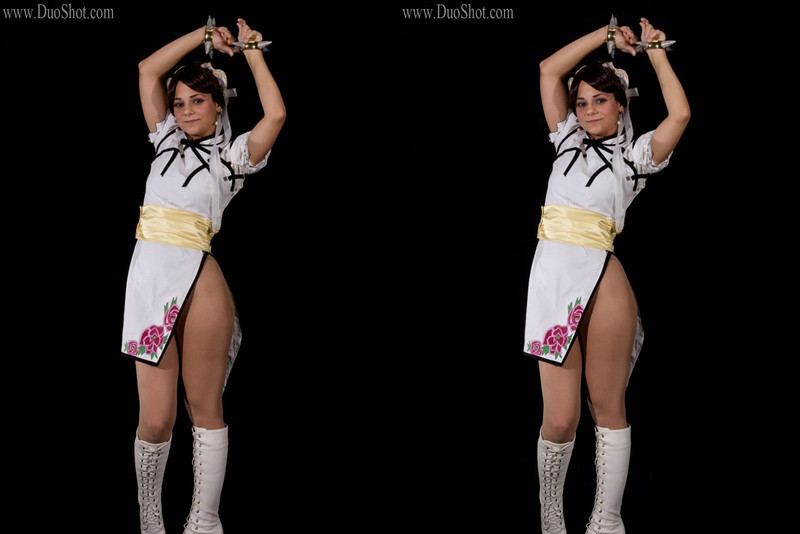
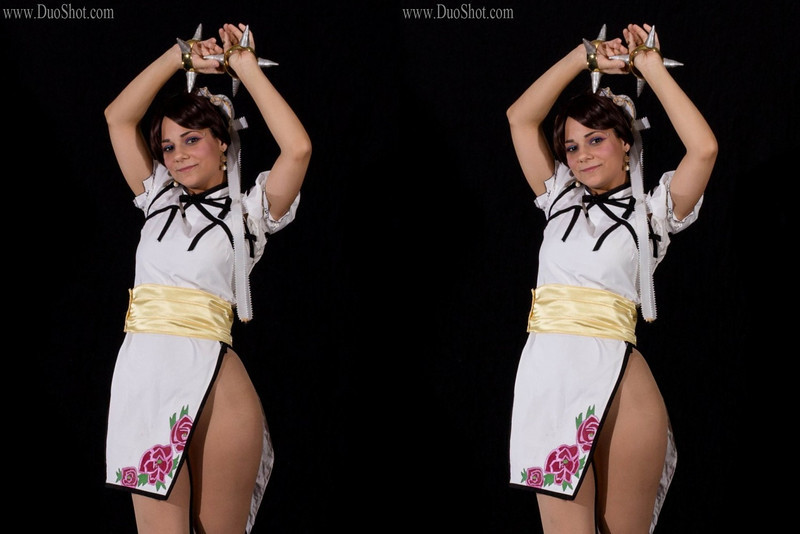
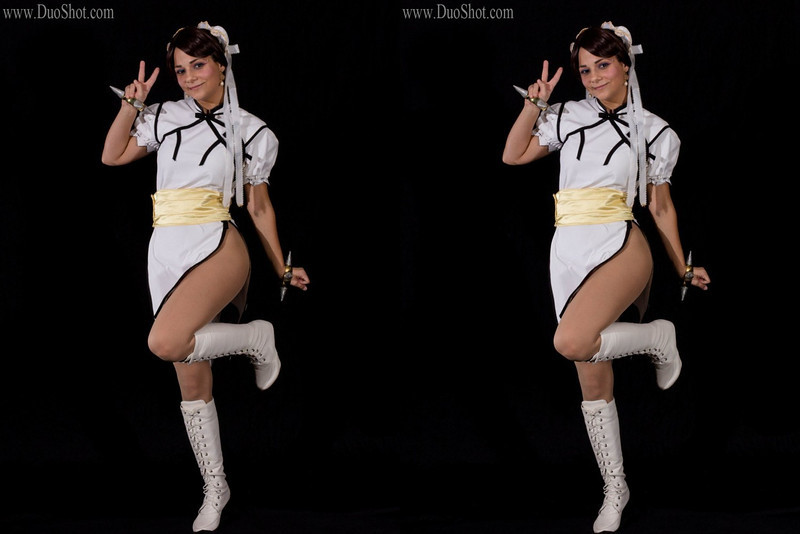
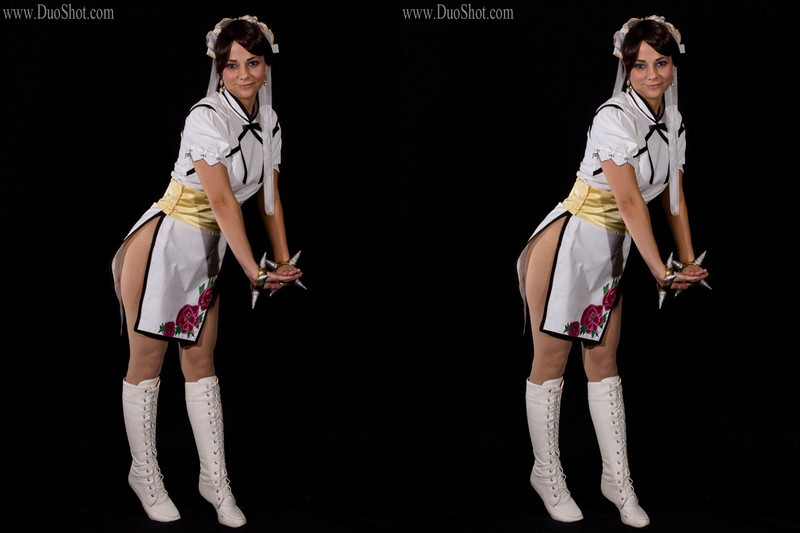
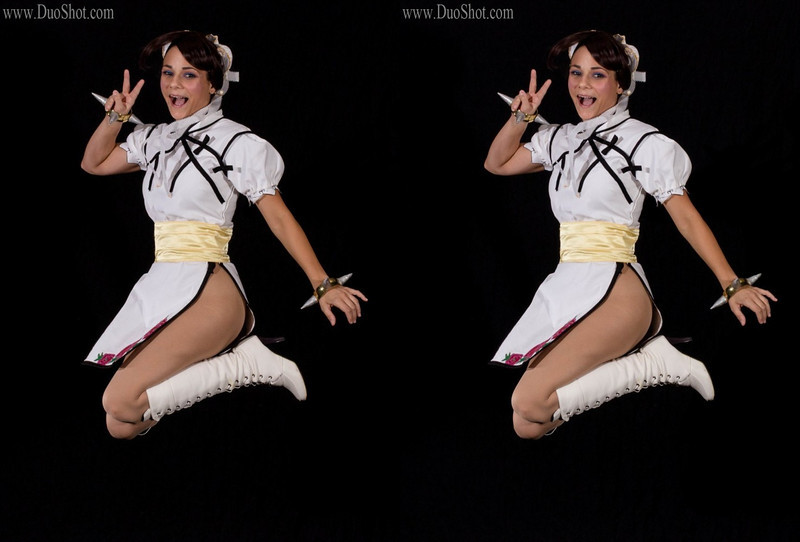
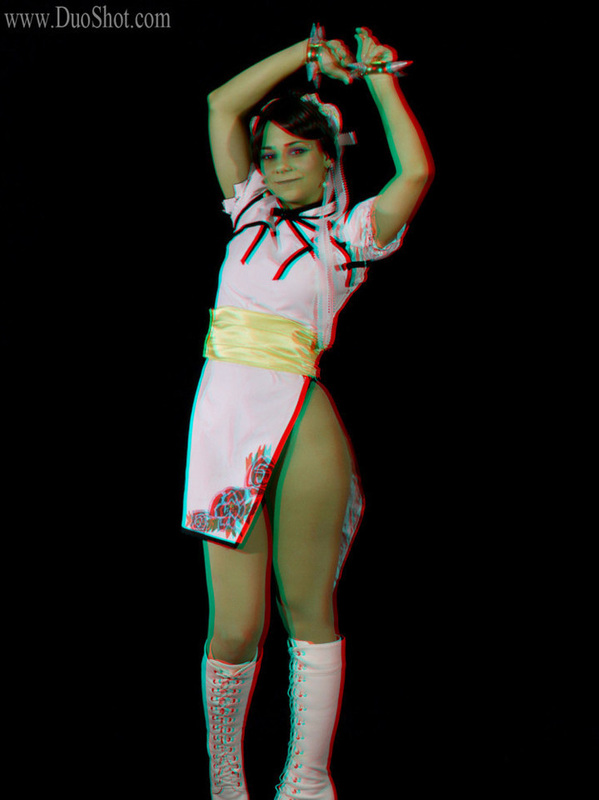
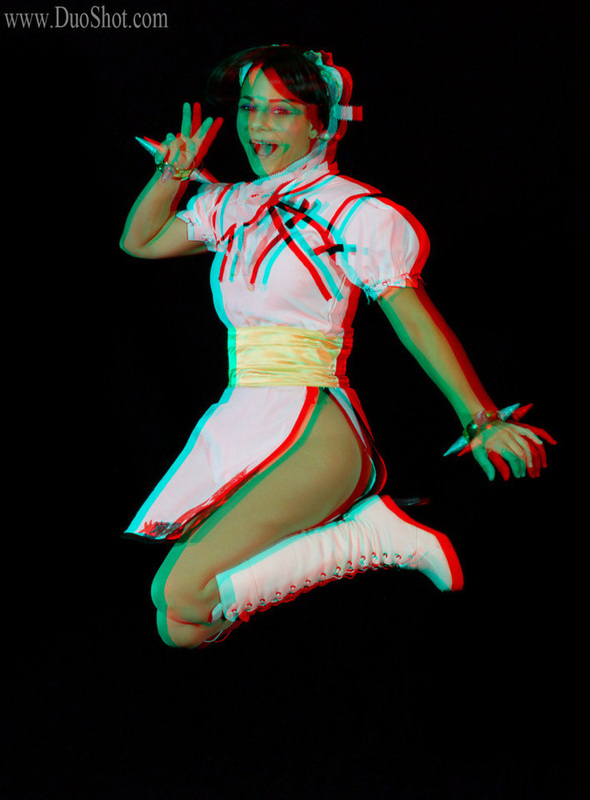
These awesome photos were taken at Dragon*Con by DuoShot.com. He uses two cameras side by side to give a 3D effect to the photos. For the first gallery you can use the cross-view (or cross-eye) method to view the photos in '3D'. Just cross your eyes to merge the two pictures together into a third single image. It takes a few tries but if your not getting it you can check out his site for some help.
      |
      |
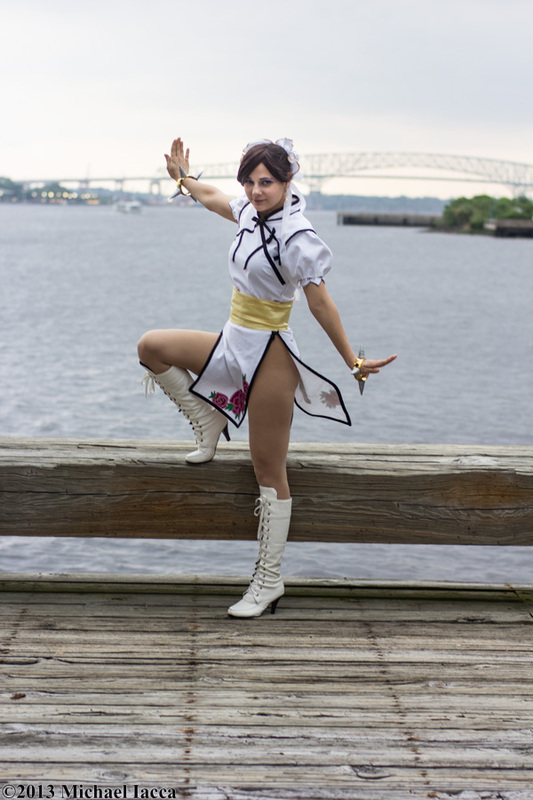
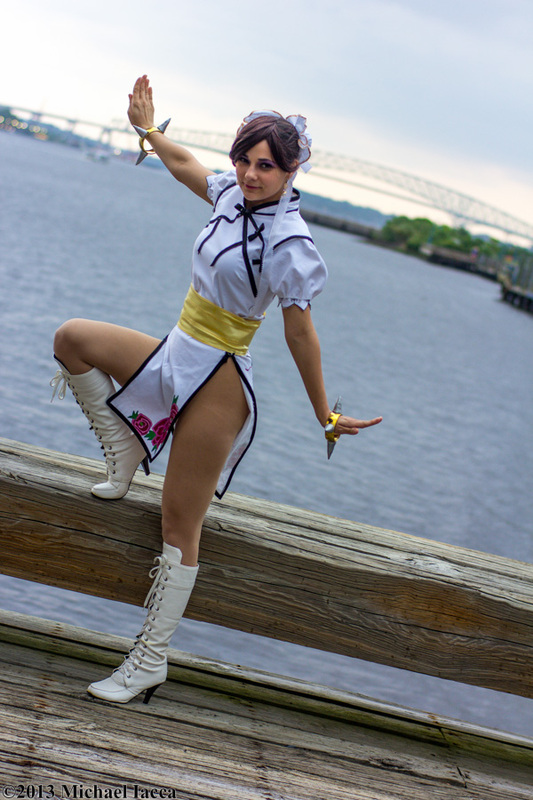
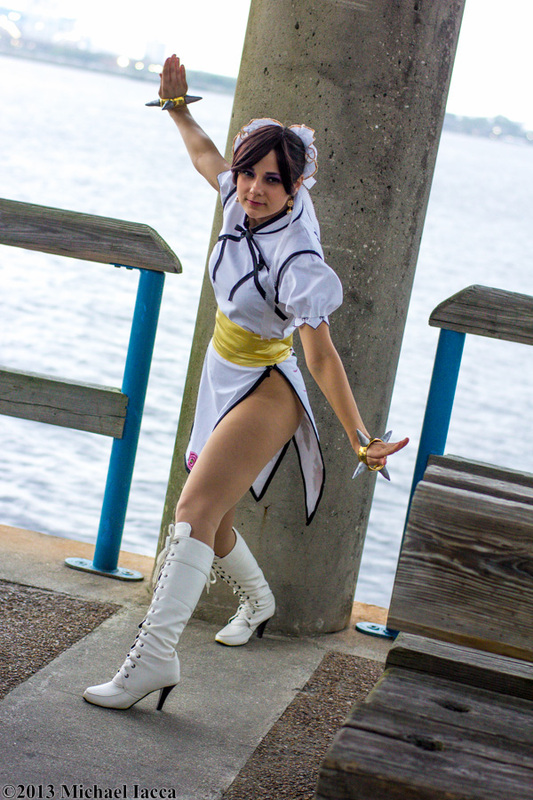
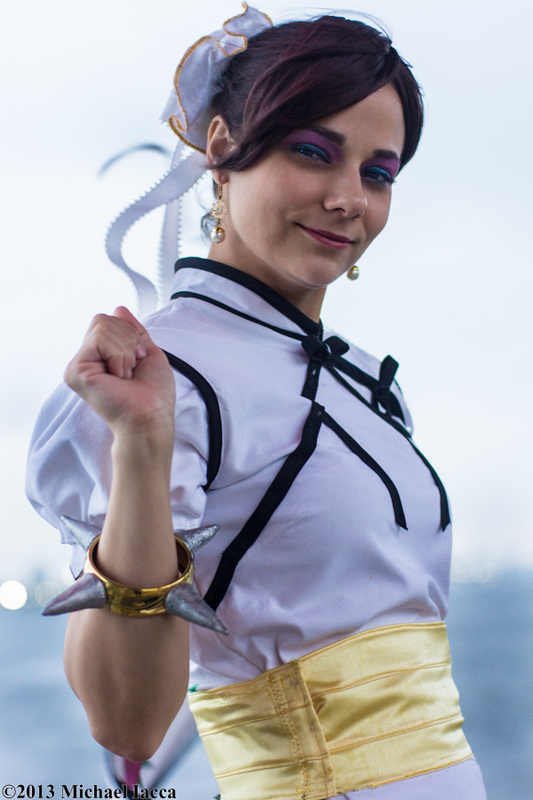
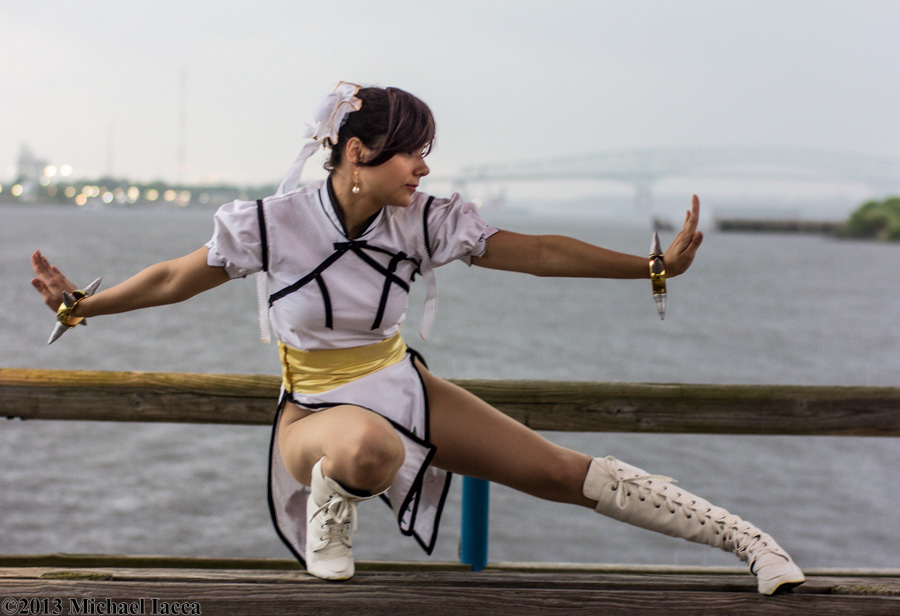
Photos by Michael Iaaca at BelleCON 2013 |
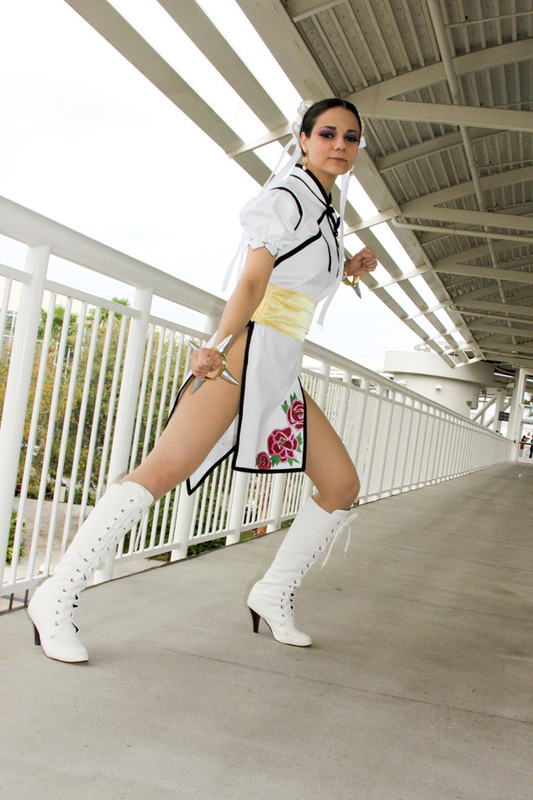
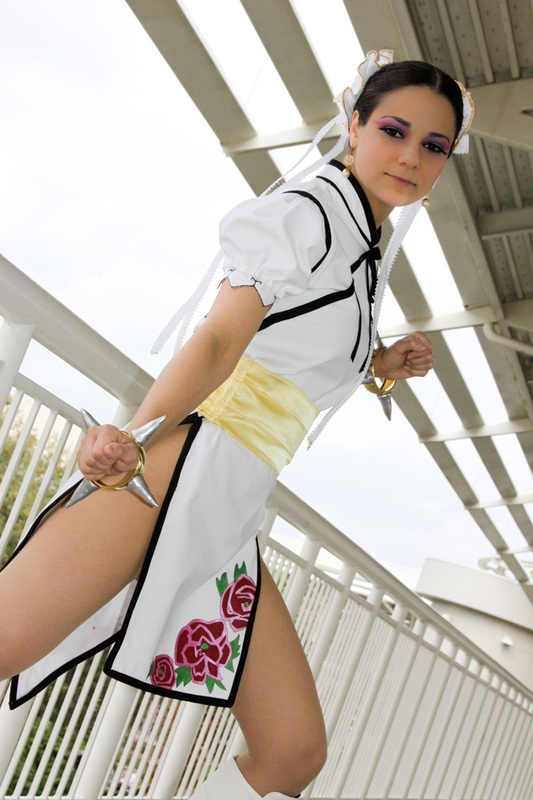
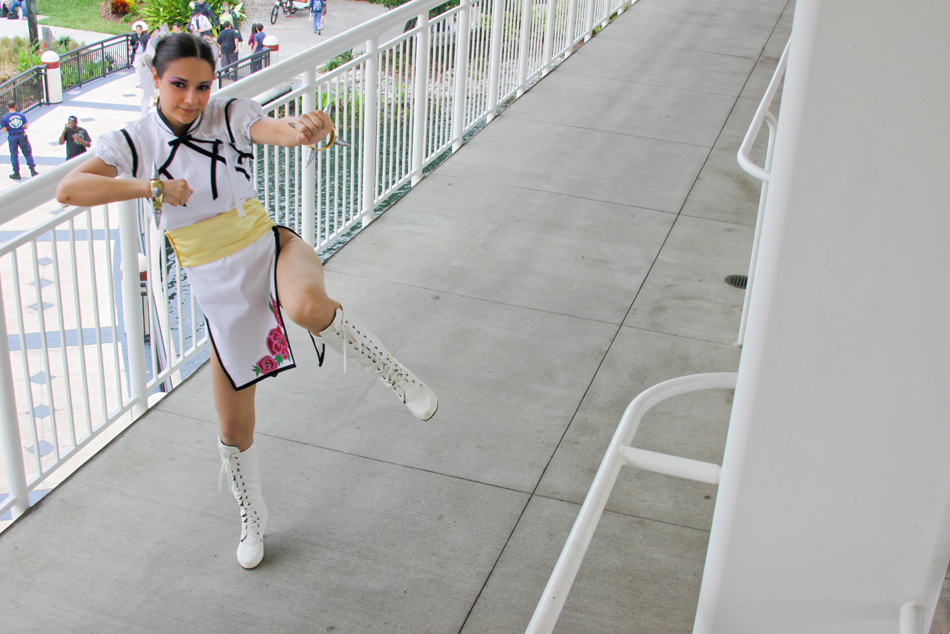
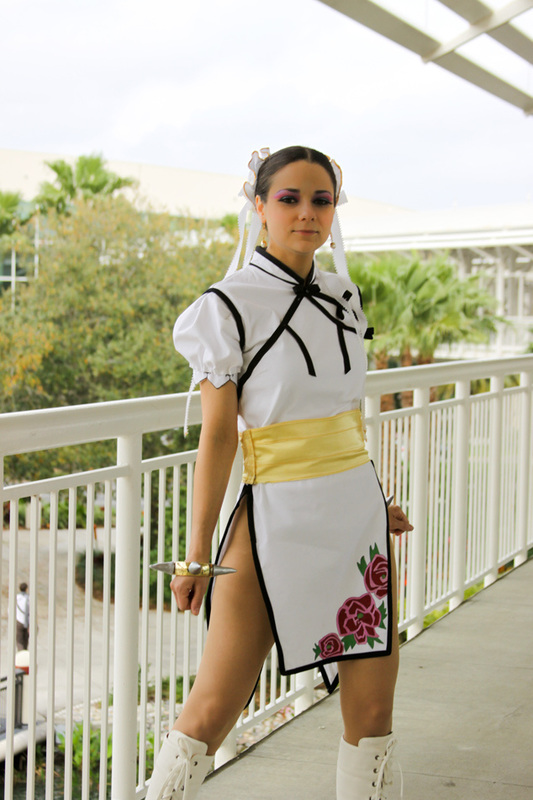
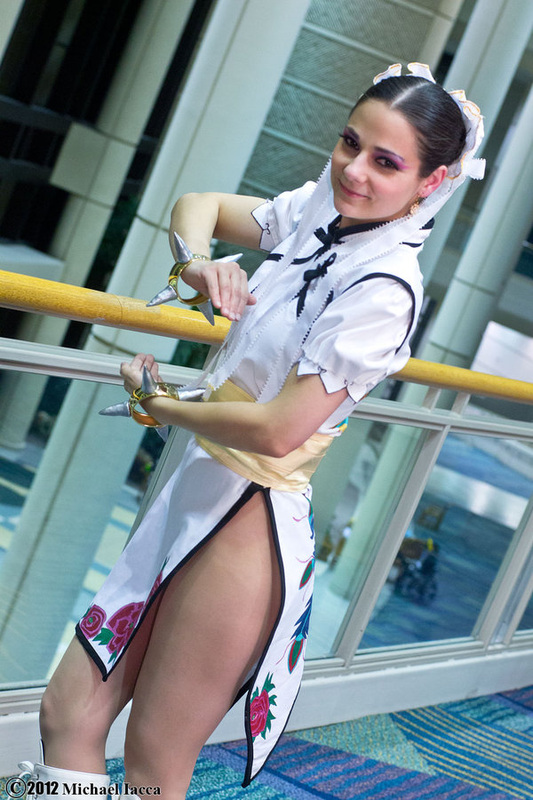
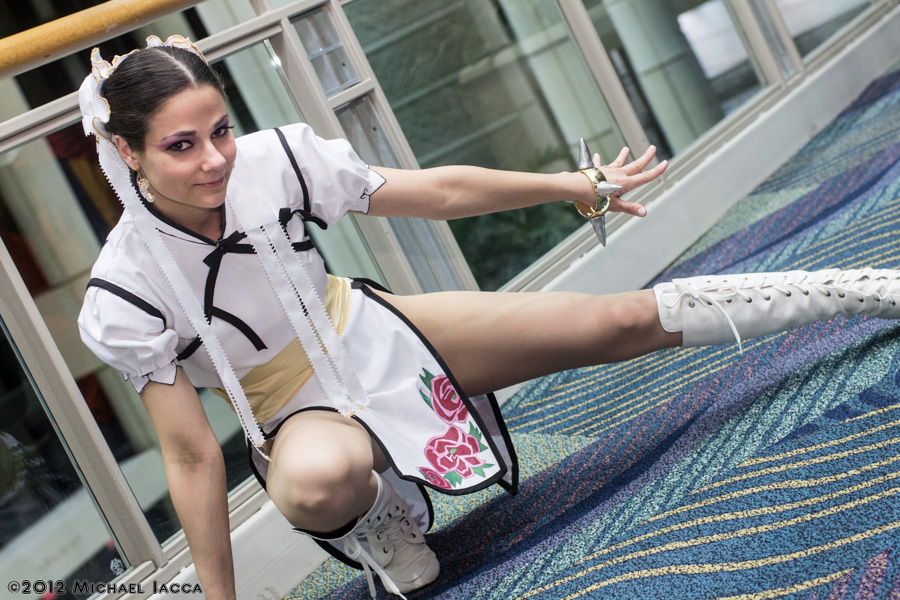
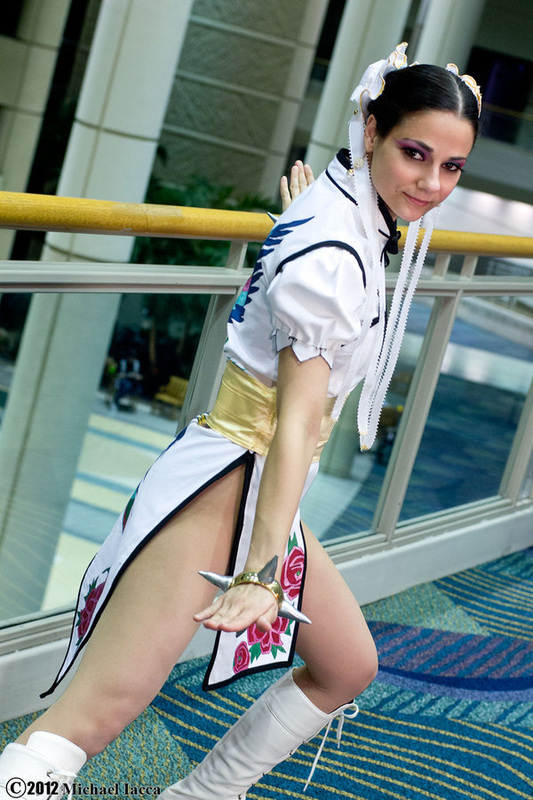
Photos by Michael Iaaca at MegaCon 2012
|
Photos taken by my waifu, the amazing Dee!
MegaCon 2012
|
EXP Con 2011
|